> ## Documentation Index
> Fetch the complete documentation index at: https://docs.plazen.org/llms.txt
> Use this file to discover all available pages before exploring further.
# Full Setup
> Set up a FULL copy of Plazen
## 1. Fork the repository
Go to [our repository](https://github.com/plazen/plazen) and click "Fork"
 ## 2. Clone your copy of Plazen
```
git clone https://github.com//plazen.git
```
## 3. Copy example .env
```
cp env.example .env
```
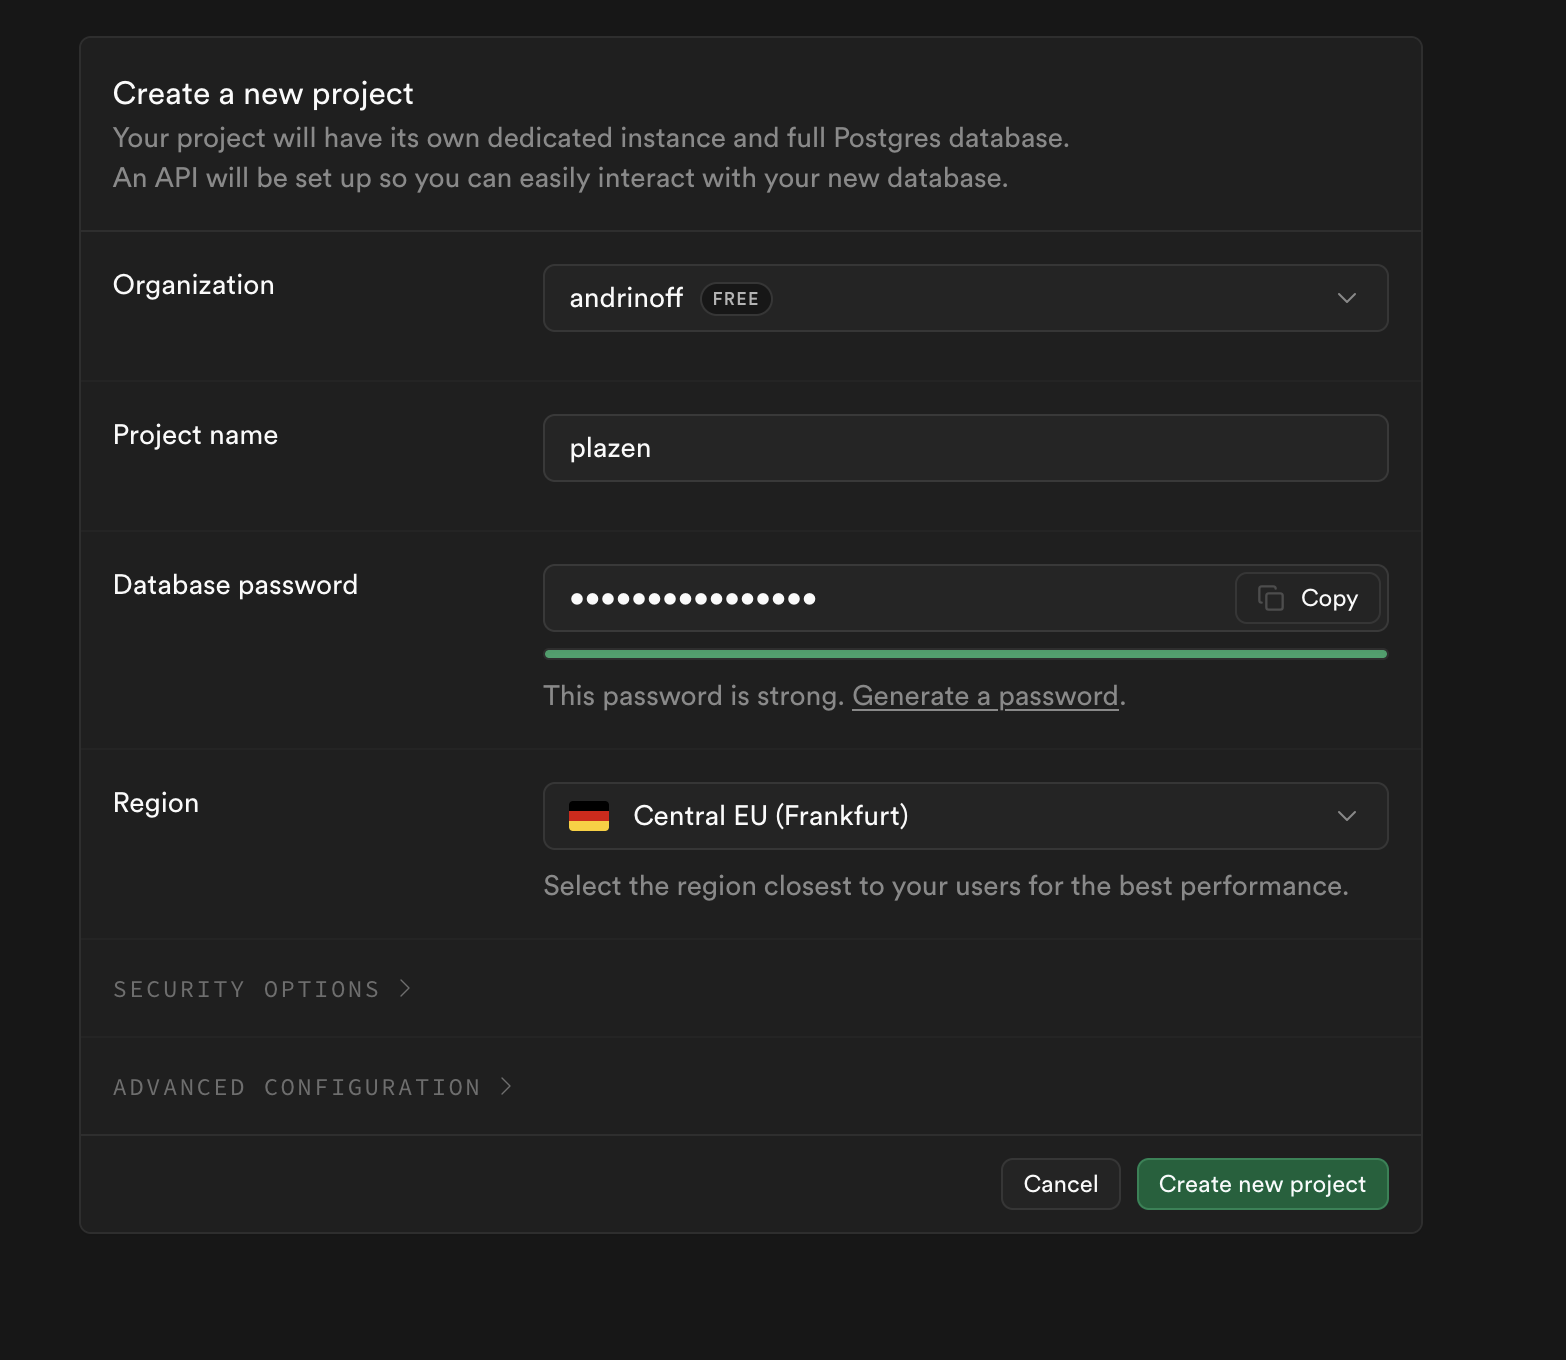
## 4. Create a Supabase project
Go to [Supabase official website](supabase.com) and create a project
## 2. Clone your copy of Plazen
```
git clone https://github.com//plazen.git
```
## 3. Copy example .env
```
cp env.example .env
```
## 4. Create a Supabase project
Go to [Supabase official website](supabase.com) and create a project
 ## 5. Get Supabase environmental values.
These are required for Supabase Auth and cookies, they are not used for database connection
## 5. Get Supabase environmental values.
These are required for Supabase Auth and cookies, they are not used for database connection
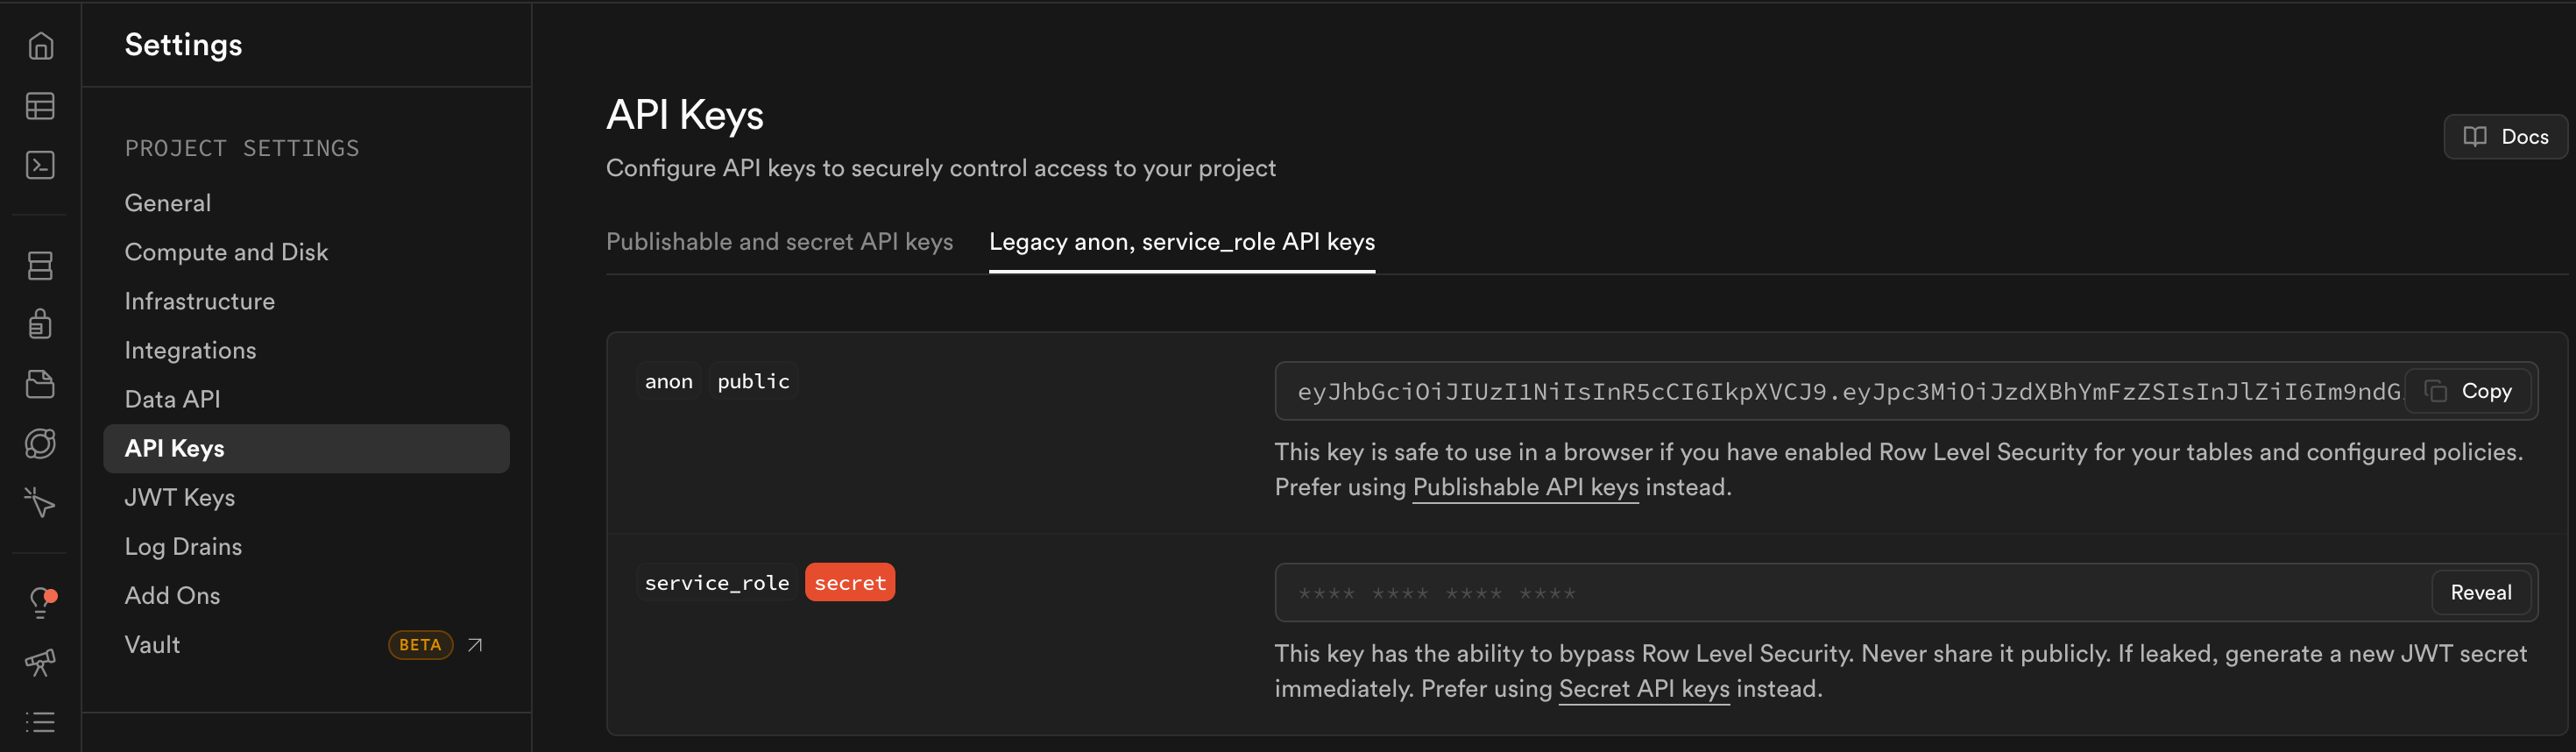 In Settings > API keys you can get:
```
NEXT_PUBLIC_SUPABASE_ANON_KEY="first_line"
SUPABASE_SERVICE_ROLE_KEY="second_line"
```
## 6. Get Prisma running
This project requires you to have Supabase as a database too currently
a. In Supabase dashboard click the "Connect" button in the top left corner:
In Settings > API keys you can get:
```
NEXT_PUBLIC_SUPABASE_ANON_KEY="first_line"
SUPABASE_SERVICE_ROLE_KEY="second_line"
```
## 6. Get Prisma running
This project requires you to have Supabase as a database too currently
a. In Supabase dashboard click the "Connect" button in the top left corner:
 b. The Supabase will give you a direct connection string that looks like this:
```
postgresql://postgres:[YOUR-PASSWORD]@db.[YOUR-PROJECT-ID].supabase.co:5432/postgres
```
c. Copy it (you will need the password from step 4) and paste it in the .env
```
DATABASE_URL="postgresql://postgres.example:example@aws-1-eu-central-1.pooler.supabase.com:5432/postgres"
```
Notice how the URL is different from the example above? It is because you have to use a pooler for the production build (Most servers don't support IPv6). If running locally, you will be fine with either
d. Now, that supabase is almost set up, you need to push our schema to the new database
```
npm install
npx prisma generate
npx prisma db push
```
\
\
This should be enough to get the project running!\
\
Other environmental variables are used for specific features.
b. The Supabase will give you a direct connection string that looks like this:
```
postgresql://postgres:[YOUR-PASSWORD]@db.[YOUR-PROJECT-ID].supabase.co:5432/postgres
```
c. Copy it (you will need the password from step 4) and paste it in the .env
```
DATABASE_URL="postgresql://postgres.example:example@aws-1-eu-central-1.pooler.supabase.com:5432/postgres"
```
Notice how the URL is different from the example above? It is because you have to use a pooler for the production build (Most servers don't support IPv6). If running locally, you will be fine with either
d. Now, that supabase is almost set up, you need to push our schema to the new database
```
npm install
npx prisma generate
npx prisma db push
```
\
\
This should be enough to get the project running!\
\
Other environmental variables are used for specific features.